Wednesday, 19 February 2014

Pink 'Lemonade' for Pirates.

I love birthday parties. I've looked forward to being a Mummy all my life so I can have fun creating birthday parties for my little people. My big boy turned 3 in February this year and after much deliberation, a pirate party was decided upon. I won't lie, I was more than delighted that the Pirate party pipped the Peppa Pig party at the post (say that fast)!! Master N and I sat down together and planned his party. He decided who he wanted to invite and after a few shouts of 'Aye aye Cap'tn ship!' and 'Arrrrgh' we set to work. It was a lot of fun. 


We made a cardboard box pirate ship.


Most of the boxes were saved from our trampoline delivery at Christmas, and the box Master S's cot came in and then we put it together with box rivets, that I bought online at www.mrmcgroovy.com It only took about an hour for 2 of us to do. I didn't have a pattern or a blue print, it sort of just came together and I stopped when it looked the way I imagined it would in my head. I cut the holes in with a stanley knife and painted on the anchor, mermaid figurehead and windows. The birthday boy is always saying 'Mummy's a mermaid!!!!!' hence the figurehead choice. The sail was 2 meters of Ikea fabric, bulldog clipped to a crossed piece of dowel, which was held up in an umbrella stand. The crows nest was an old plastic bucket with a hole cut in the bottom and the bunting I made for N's first birthday party. I found the bit of fish net underneath the house, it was left over from a failed gardening project from a few years ago.

I bought these gorgeous little 150ml Ball Mason jars through my co-op, the tiny milk bottles are recycled - that's what our Ivyholme Organic Dairy pouring cream comes in and the large bottles are recycled Ivyholme milk bottles. I made 'pink lemonade' which was actually more raspberry cordial, with frozen raspberries, sugar and water whizzed up in the Thermo and strained through a nutmilk bag and then some iced tea for the grown ups.

I found all these bits of scrap wood on the ground under the saw while my husband was working on making garden edges, I thought they would make a great sign, so he whipped one up for me (begrudgingly, he thinks I'm a total pain when it comes to birthday party requests!) I just pained the wood with acrylics - it was very easy and effective.


No pirate party is complete without a giant pirate ship cake. I'm not going to lie I had a great time putting this together! 


Here is a close up of the treasure chest. 


I try to make party food a mixture of naughty and nice. So we had watermelon slices, fruit salad boats, homemade dips with veggie sticks, mini chocolate 'ship' cupcakes, pirate bananas Arrrgh!, iced sugar cookies (recipe is on my blog!), fairy bread and homemade sausage rolls. 


Fruit salad ships

 
Iced pirate themed sugar cookies 


The birthday boy about to blow out his candles. 

I have a sneaking suspicion that next year a superhero party could be on the agenda.....


Monday, 17 February 2014

Pasta Threading


A while ago Mr 3 & I dyed some pasta. It was a fun activity on it's own, sorting the pasta into piles, choosing the colours, adding the food colouring to water & mixing the primary colours to get our green & purple & orange. 


I'd quite forgotten about the 2 buckets of colored pasta I had tucked away, until today, when it was simply too hot for outside play. I had to come up with something cool..... so pasta threading it was. Not long ago, I accidentally ordered this plastic rope thread from officeworks online (thinking it was ribbon) so I used that as our thread, I sticky taped a half sized skewer to the top of the plastic string and that was our threading needle. It was fun, as well as educational.We counted, sorted and picked out colours. It also took a lot of concentration & some fine motor skills, for a little person. 

After a while, N accidentally stepped on one of the prices of pasta. It crushed underneath his foot, making the most delicious crunching sound.... I let him stomp on a few more before the activity turned back to threading. 

Dying pasta:

1 packet of penne style pasta
Various food dyes

Mix 1ltre water with 1-2 teaspoons of food colouring (cold water is fine) add pasta, leave for a couple of minutes, remove with a slotted spoon and leave to dry overnight on paper. 

You can used the pasta for threading, gluing or shakers or even pretend kitchen play.

Happy playing! 


Saturday, 15 February 2014

Fruit and veggie stamping


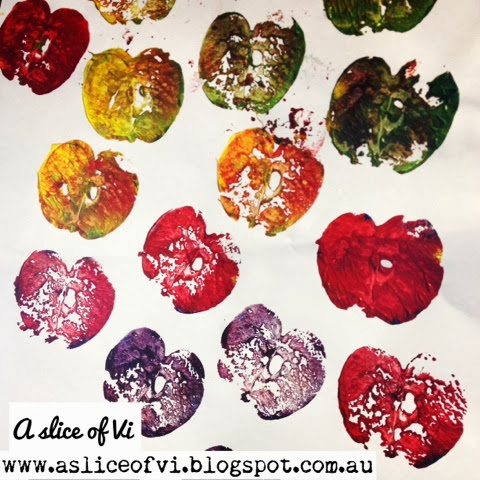
I asked Mr 3 what he wanted to do the other day and he gleefully yelled "painting!!!!!" as he yahooed around my ankles in the kitchen. Painting it was. Instead of the usual paintbrush painting we do, I thought we would do some fruit & veg stamping. I remember doing it at preschool when I was a kid... many moons ago now!!!

I had apples & potatoes to spare, so I sliced an apple in half and cut some shapes out of potato slices with tiny cookie cutters. I used some small skewers as handles and poked them in the backs of the apples & spuds. I just used acrylic paints squirted on some cardboard and stood back... N dipped the stamps in and pressed onto paper, he also used paintbrushes to paint the bottoms.

Much fun was had. 

We also have some great sheets of homemade wrapping paper now. 

Happy playing.


Friday, 14 February 2014

Crochet - hello old friend

I've recently been inspired to pick up my crochet hooks for the first time in 20 years. I was invited to contribute a square to make a blanket for someone who needs a lot of love right now. I ended up making a trip to this little shop called Tangled Yarns at Newstead before I could hook 1 stitch, because I had every size crochet hook on this green earth including wooden ones, except a 4.0, which is what I remember using when I was a young girl. My wonderful Nan taught me to crochet. I have all her old crochet hooks in a little tooled leather case. I remember her patiently teaching me. I used to make little granny squares, which were mainly used as dolls blankets in my dollhouse and doilies, usually in outrageous colour combinations, like lime green & purple.... as it turns out, my colour combinations are still a little outrageous. I just love rainbows. It was such a trip down memory lane at Tangled Yarns looking at all the lovely yarn and hooks and bits and bobs, much like strolling through my Nan's sewing room. 

What will I make next? 

If you're in Brisbane & you're yarn-y I highly recommend a trip to this lovely little shop. I had Master S in the Manduca but next time I have a second alone.. (perhaps in 20 years!) I'm going to head in there and enjoy a HOT cup of coffee* and one of their scrumptious looking cupcakes. 

http://www.tangledyarns.com.au/catalog/

*I'm still dreaming of hot coffee.....


Wednesday, 12 February 2014

Butter cake with passionfruit cream cheese frosting

Butter cake with passionfruit cream cheese frosting


This is a gorgeous moist cake - it's dangerously good and so simple! The passionfruit icing just finishes it beautifully. I love passionfruits, I think I've grown a vine in almost every house I've lived in. At the moment I am training one over a triangle shaped frame in our garden, so when it's covered in the leafy green folage, Mr 3 shall have a passionfruit tent, to crawl through, lie under or read a book in.... maybe even picnic on a slice of cake in there too! 


TM Method

Ingredients:

Cake:

440gms raw sugar (to process to caster sugar)
250gms butter
1 tsp vanilla bean paste
4 eggs
340gms self raising flour
25gms corn flour
220gms milk

Icing:

250gm pkt cream cheese - remove from fridge 20 mins prior to soften
Pulp from 2 small passionfruits or 1 large (if using frozen passionfruit use 2 ice cubes)
220gms icing sugar

Method

Cake:


Preheat oven to 160*c fan forced.
Grease a 22cm springform baking tin with butter and line the bottom with baking paper***.
Add 440gms raw sugar to TM bowl and process 5 secs | sp 10.
Add 250gms butter, bring together 5 secs | sp 6.
Add butterfly, beat 30 secs | sp 4.
Add 4 eggs, 1 tsp vanilla bean paste, beat 10 secs | sp 3.
Add 340gms self raising flour and 25gms corn flour and 220gms milk and mix 40 secs | sp 6.
Pour into a prepared springform baking tin and bake for 45-60 minutes until a skewer comes out clean from the centre.
Allow to sit in cake pan for 5 mins and then turn out onto wire rack to cool completely. 

Icing:

Scoop passionfruit pulp from fruit or put frozen cubes into TM bowl mill 40 secs | sp 9. (Omit this step and leave seeds whole if you prefer, just add passionfruit and continue with recipe below)
Roughly cut cream cheese into 2cm cubes with spatula and add to TM bowl with 220gms icing sugar and whip 40 secs | sp 4.

Spread generously onto cake with spatula once cake has completely cooled. Store in air tight container on the bench, or in the fridge. If you store in the fridge, allow cake to come back to room temp before eating (this will ensure the texture is lovely and soft).

Conventional method:

Ingredients:

Cake:


2 cups caster sugar

250gms butter

1 tsp vanilla bean paste

4 eggs
2 cups self raising flour
1/3 cup corn flour
1 cup milk

Icing:


250gm pkt cream cheese - remove from fridge 20 mins prior to soften
Pulp from 2 small passionfruits or 1 large (if using frozen passionfruit use 2 ice cubes)
1 cup icing sugar

Method:

Cake:

Preheat oven to 160*c fan forced.
Grease a 22cm springform baking tin with butter and line the bottom with baking paper***.

Cream butter & sugar in mix master or with electric beaters.

Add vanilla bean paste.

Add eggs one at a time and beat at a low speed until combined.

Gradually add dry ingredients plus milk into mixture and beat until well combined.
Pour into a prepared springform baking tin and bake for 45-60 minutes until a skewer comes out clean from the centre.
Allow to sit in cake pan for 5 mins and then turn out onto wire rack to cool completely.

Icing:

Crush passionfruit in pestle and mortar (or you can leave whole if desired) add cream cheese and icing sugar to mix master or use electric beaters and mix until combined. Spread generously onto cake with spatula once cake has completely cooled. Store in air tight container on the bench, or in the fridge. If you store in the fridge, allow cake to come back to room temp before eating (this will ensure the texture is lovely and soft).


***the easiest way to get the baking paper the right size is to put the baking tin on a square of baking paper, draw a ring around the outside with a marker and cut it out with scissors. You will have a precise circle which will sit nicely inside the tin and mean your cake will come out easily.


Enjoy!!!


Monday, 6 January 2014

Mango macadamia smoothie

So, as you might have guessed by the recent chutney & ice cream recipes, we have had a major oversupply of mangos here at the moment! Mangos are definitely one of the upsides to a Queensland summer!! Unfortunately one of the downsides at this time of year is having a mango tree in the front yard!!! Our mango tree is at that annoying stage - the bats and possums have their seasonal passes in full swing, and every morning there are what feels like 10,000 half eaten mangos scattered about the front lawn, garden and driveway - the remnants of a midnight feast. Then there is the added bonus of 'what goes in must come out!' with bat droppings all over my car, front steps and garden path. So charming - wash the car one day and the next morning it looks like it's never been washed in its life - bits of mango and bat droppings splattered all over it. 'Only another few weeks' is what I must keep chanting to myself at this time of year...as I step in another half eaten mango on the way out the front gate. It's such a lovely old shade tree and goodness knows how ancient.... Soon enough the pain will be over & the bats and possums gone for another season.

One of my friends asked me for 'frozen mango options!!' when I was in the middle of my mango recipe frenzy recently. Apart from the obvious mango daiquiri (sure helps cope with the wildlife mess out the front!) we have been loving these mango & macadamia smoothies!  Mr almost 3 & I have been having them for brekky all week, as I too have a freezer full of frozen mango. This recipe inspiration came from my gorgeous friend & fellow Thermomixer Amy Welsh. We were doing some Christmas cooking together last month & she whizzed us up a quick mango macadamia smoothie - it was so delicious and filling - I came home experimented with her ingredients.

Mango macadamia smoothie


Ingredients:

300gms diced frozen mango
30-40gms whole raw macadamia nuts
500gms coconut water

Method:

Simply add all ingredients to your Thermomix bowl and blend 1 min speed 9. 

This makes 2 large or 4 small smoothies. 

If these are a little thick for you, add some filtered water and blend on speed 4 for 10 seconds. 

Enjoy!! 

Wednesday, 1 January 2014

Creamy Mango Ice Cream Bars

I usually get someone to roadtest my recipes before I post, but this one is pretty simple, so fingers crossed you like it! 

WHY do I get someone to road test my recipes?! It's pretty simple. 
I never measure anything. 
I never write anything down. 
I never time how long I cook anything for.... it's just the way I've always cooked. 

I measure by eye. 
I cook by memory,
and I judge readiness by taste, smell and sight. 

So sometimes while I'm merrily jotting down a recipe for here, I do a few things intuitively and forget to write them down... so in order for you to avoid disaster, I try to cook my own recipes as per my own instructions, once I've drafted them on here. Then, to be sure to be sure.. I have a few lovely friends who are happy to be my guinea pigs!

A big part of the reason I started this blog, is because I'm often asked for my recipes - and they are almost always in my head... or if I've followed someone else's recipe, I usually look at the ingredients list and the picture, and then change it according to what I've got in the cupboard or what I think will work better! I can't even count how many times I've given out my spinach pie recipe (it's coming..) or my Tuna Pasta recipe... so this blog now means I have a record of things and I can point everyone in this direction!


Creamy Mango Ice Cream Bars


Ingredients

5 large ripe mangos*
1 cup water (200gms)
1 cup raw sugar (200gms)
the juice of half a lemon
250mls pouring cream (250gms)

*If you have mangos in the fruit bowl that are still a little firm, it's worth waiting a few days until your mangos are nice and ripe, especially if you are planning to omit some/all sugar (see note below)

TM Method

1. peel and slice mangos, set aside
2. weigh 200gms sugar and 200gms water in the TM and cook 
5 mins | 100 deg | speed 2
3. add mango slices you set aside in step 1 to TM bowl and blend 20 secs | Sp 9
4. Set aside 1 cup of blended mango puree from step 3 in the fridge 
5. line a baking tray or a square cake tin with baking paper, you need the paper to come up the sides of the tin by about 2.5cms or an inch (this will make it easier to get your slice out in one piece in the end)
6. pour remaining mango puree into the tin and put in the freezer to set


7. once the first tray of mango has set, add the reserved cup of mango plus 250gms pouring cream into the TM bowl and blend 20 secs | Sp 5
8. Pour on top of frozen mango tray and put back into the freezer to set. 
9. Once the top layer has set, remove tray from freezer, upturn onto a board and rub a cloth thats been rinsed under hot water and wrung out, all along the bottom of the upturned tray. This will soon slightly melt the bottom of the mango mixture making it easier to remove from the tray. 


10. run a knife under hot water and dry and slice your mango icecream into whatever sized bars you like. 


I wrap mine in baking paper and store in a container in the freezer so they are easy to remove and don't all stick together. 


Conventional Method


1. peel and slice mangos, set aside
2. add 1 cup sugar and 1 cup water to a small saucepan and simmer, stirring frequently until all sugar has dissolved. Set aside to cool
3. once your mixture is cool pour into a blender with the set aside mango slices from step 1 until it's completely smooth
4. Set aside 1 cup of mango puree in the fridge from step 3
5. line a baking tray with or a square cake tin with baking paper, you need the paper to come up the sides of the tin by about 2.5cms or an inch 
6. pour remaining mango puree into the tin and put in the freezer to set
7. once the first tray of mango has set, add the reserved cup of mango plus 250mls pouring cream into the blender and blend until combined
8. Pour creamy mixture onto the top of the frozen mango tray and put back into the freezer to set
9. Once the top layer has set, remove tray from freezer, upturn onto a board and rub a cloth thats been rinsed and under hot water and wrung out, all along the bottom of the upturned tray, this will soon slightly melt the bottom of the mango mixture making it easier to remove from the tray. 
10. run a knife under hot water, wipe dry and slice your mango icecream into whatever sized bars you like. 

I wrap mine in baking paper and store in a container in the freezer so they are easy to remove and don't all stick together. 

*If you have mangos in the fruit bowl that are still a little firm, it's worth waiting a few days until your mangos are nice and ripe, especially if you are planning to omit some/all sugar

NOTE:

I do this for my almost 3 yr old without the sugar, using a similar method, except I pour into popsicle trays in reverse. So I set aside the water/mango/lemon mixture, and blend the cream and reserved cup of mango, and pour this into the bottom of the popsicle moulds, just a tiny amount. I let this set in the freezer and then fill to the top with pureed mango. There are no complaints!


If you are dairy free or vegan, you can swap the cream for coconut cream following the same method.

Enjoy!

Total Pageviews