Showing posts with label Preserves. Show all posts

Friday, 11 July 2014

Paw Paw Chutney

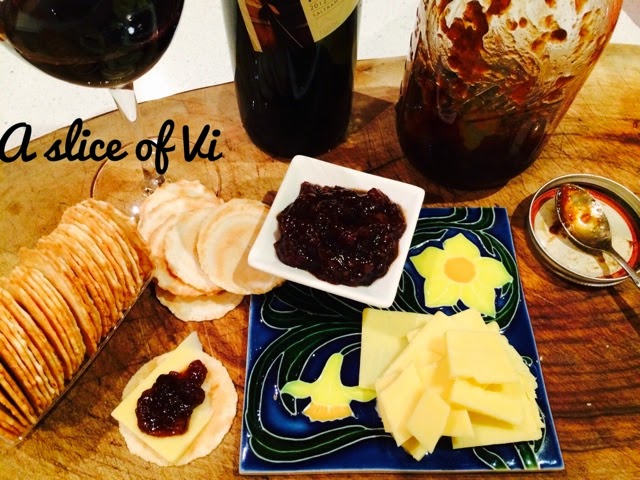
I'm one of those people who work best under pressure. If there's no deadline looming, you can be guaranteed I haven't started it yet. It seems that this is not only an area of talent in my professional life, but the skill also transfers into the kitchen as well! Some of my best recipes have been thrown together at the last minute, and this is no exception... It was created in 10 minutes on Monday afternoon at about 4:30, when I needed to have it ready to go by 6:30 the same day. I'd also been in Toowoomba all day. No pressure.. Luckily, we have a fabulous green grocer around the corner and I picked up a couple of 1/2 ripe papayas and a bottle of malt vinegar in a flying rush when I picked up N from Kindy. A quick practice run and I was in business. I flew out the door at 6:29 with my Thermomix bowl still warm from the practice batch. This is great to make when mangos are out of season, it has a similar taste & texture and is still just as delicious. It seemed to be a hit with my fellow Thermomix posse and I've had lots of them gently reminding me to hurry up and post the recipe all week!!! So... here goes. Just like the green mango chutney, this keeps well in the fridge or preserved in jars in the pantry. It's delicious with cold meats, dolloped on the side of a bbq plate, perfect with some sharp cheese on a cracker. It's excellent on sandwiches, it can be blended and mixed with a little oil to be used as a glaze for meats or roasted vegetables and is great with curries .


TM Instructions
Ingredients

450gms Green or 1/2 ripe Paw Paw or Papaya (approx 1/2 medium paw paw)
1 medium green apple - peeled and cored and cut into 4
1/2 medium red onion
10 gms peeled ginger
4-5 cloves garlic
1 birds eye chilli - if you want it spicy you can add more. If you're not keen on chilli remove the seeds
100gms pitted dates
100gms sultanas
1 tsp curry powder
1/2 tsp allspice
1 tsp salt
300gms malt vinegar
100gms water
300gms brown sugar

Method


1. Cut the skin off the paw paw and remove the seeds, cut into 3-4cm cubes 

2.) Add Paw Paw, Green apple, red onion and garlic to TM bowl and chop 2 secs | speed 5, set aside. 

3.) Add ginger and red chilli to bowl and chop 5 secs | Speed 6| scrape down side

4.) Add paw paw and apple/onion/garlic mix to TM bowl, add 
100gms dates and 100gms sultanas, 1 tsp curry powder, 1/2 tsp allspice, 1 tsp salt, 300gms malt vinegar, 100gms water and cook 10 mins | varoma |sp 1 | reverse with MC cap on
5.) Add 300gms brown sugar and cook 50 mins | 100 deg | Sp soft | reverse with the varoma bottom on top - this lets the steam out but catches the spitting.

6.) Cook for a further 20 mins | varoma | Sp 2 | reverse with varoma bottom on top You should be able to tell if the chutney is ready, as it will be thick and sticky, and it will 'gel' when tested on a cold plate. 

Bottle in hot sterile jars.

This recipe makes approximately 1 litre of chutney.


Stovetop Method 


Ingredients:
3-4 medium to large paw paws
5 green apples
1 cup water
1.5 litres brown vinegar
1.5 kgs brown sugar
2 handful dates
2 handful sultanas or raisins
1 large knob of green ginger (peeled)
1 large knob of garlic  (all cloves peeled)
6 birds eye chillies (if you don't like spice you can leave these out or reduce down the amount)
1 teaspoon allspice
1 tablespoon curry powder
1 tablespoon salt
2 large red onions

1. Prepare paw paw as per TM method (peel, remove seeds)
2. Either use a food processor top chop paw paw/apple/onion/garlic/ginger OR dice up paw paw, apples, onion and garlic with a knife and grate ginger. Chop chillies finely. 

3. Add paw paw and apple to a large pot with 1 cup of water and bring to the boil stirring regularly

4. Add all ingredients EXCEPT sugar to a large pot, bring to the boil and then gently simmer for 1/2 an hour, stirring regularly

5. Add sugar and simmer on a low heat for 2.5 to 3.5 hours stirring regularly. 
This recipe makes about 3.5 kgs of chutney. If you don't have a pot large enough to put everything in, you can split it between 2 pots. Just halve the recipe if you don't want to make as much, the cooking time is similar though. 
Bottle in hot sterile jars.

Monday, 14 April 2014

Preserved lemons, rubbish sleepers and my chiropractors superfund.

I don't get to blog as much as I would like to. Most of my posts are done one handed on my iPhone while I rock my baby to sleep. My babies are rubbish sleepers. It seems the best and only place to be sleeping when you're a bebe - is on top of me. Mr 3 is a good sleeper now, but as a baby - rubbish. Mr 9-months is trying hard to break his brothers record of rubbish-sleeping-ness. It's going to be a close call. I know it won't last long and one day I'm going to look back and miss these days when all they wanted was to be tangled in my arms. <3 ..... although it does get tiresome, especially in the wee hours of the morning.  I bought a giant comfy armchair and ottoman when I was pregnant with my first son,  it's turned out to be a stellar investment as I have spent many a night in it (each one contributing handsomely to my chiropractors superfund) - many hours passed with a little boy tangled in my arms. So tonight, with Spider-man gently snoring on the other side of the room & my littlest super-hero snoozing on my chest, I shall pass on another recipe.

Preserved Lemons

I love lemons. LOVE them. Such versatile little things. I love a bit of lemon squeezed into cold water on a hot day. I love the juice of half a lemon in a mug with a tablespoon of honey when I'm feeling average. A couple of slices of lemon, a sprig of mint & a slice of ginger makes for a lovely simple tea. I use them in salad dressing, marinades, dips and desserts. I always have a few in my fruit bowl, even when you have to remortgage your house to buy them just before they come into season again!! As a kid I used to eat bush lemons, peeled like an orange & sprinkled in salt. Yum! Truth be told, I still do occasionally. I was so excited to see them appear on my co-op order list about 4 weeks ago! The first thing I did with my kilo of new season lemons, was preserve them. I was watching an episode of Food Safari ages ago & I saw someone preserve some lemons. I remember thinking how simple it looked. Then, when I paid $14 for a tiny  jar of them  in order to make my favorite chicken, preserved lemon & green olive tagine (that recipe comes later!), I almost died! I came home & promptly made my own. This year I have done several small jars - now you can do the same. 

Preserved lemons

Ingredients
Lemons 
Salt 
Water
*quantities depend on how much you want to make as explained below

You will need some sterile jars - depending on how many lemons you have. You can work on about 4-6 lemons for an average sized jar.

Method

Cut the tops & bottoms off your lemons like so...


Then cut a cross in them, about 3/4 of the way down the lemon.


About this far down..


Then pack a heaped teaspoon of good quality salt into the centre....


.....and then into the other side....


Then pack lemons tightly into a jar. To make them fit better you can cut in half and pack with one heaped teaspoon of salt instead of 2.


Once all your lemons are in, add a couple more heaped teaspoons of salt on top for good luck. Then fill with filtered water. 


Seal tightly, and keep in a cool dark place for a month before using.  The water will 'thicken' when they're ready. Once you break the seal keep in the fridge.


Enjoy! 

Tuesday, 1 April 2014

Tomato Passata - a chunky homestyle delicious sauce.

I just can't resist home made passata. It's simply sunshine in a bottle. When I lived in Cairns, I used to buy gorgeous plump ruby red tomatoes from the 'Happy tomato plantation' at Rusty's markets every week. These amazing farmers made the trip down from the tablelands each week so we could have the best and freshest produce. God bless farmers!!!!! I used buy kilos of their juicy tomatoes which only continued to get more delicious as they sat in a bowl on my windowsill and ripened further. 

Every time I'm in Cairns, I can't resist a trip to Rusty's markets to reminisce. I try and head in early on a Friday or Saturday morning and enjoy the mixture of tourists, backpackers, locals, farmers, buskers and characters. I buy myself a fresh coconut, a Govinda's yummy samosa or a Hasham's vegetable spring roll and walk around and enjoy. If I'm up home for a while, I usually arrive back at my Mum's house with a bunch of tropical flowers for her and a few bags of happy tomato plantation goodness - hopefully they are still there in the same spot - selling their gorgeous tomatoes, cucumbers, zucchinis eggplants and other delicious produce!


Tomato Passata - makes 750gms - 1 litre


Ingredients 

1.5 to 1.6kgs ripe red tomatoes (make sure you leave them to ripen until they are red and soft to touch , or get your hands on a box of seconds)
1 brown onion
2-4 large cloves garlic (I use 4 large cloves)
a large hand full of basil leaves (I use the large sweet basil)
50gms olive oil
2 tablespoon of TM vegetable stock
2 tablespoons raw sugar
200-300gms water


a couple of stems of basil leaves for the preserving jars


TM Method

1.Prepare your tomatoes, with a paring knife, cut the core out of the tomato and cut a cross in the bottom of each tomato - this will mean that the skins will slip off easily once boiled. (I don't usually take the core out of mine, but you can)
2. Put the tomatoes in the varoma dish - you should be able to fit 1.5kgs approx at a time. If you are doing more than one batch of tomatoes, second and subsequent batches will only need 10 mins of steaming time. 


top

bottom

3.Cook tomatoes 20 mins | Varoma | Spd 2

4. Remove the varoma and set aside to cool (you may want to place a glass bowl underneath to catch any drips)

5. While the tomatoes are cooling, peel 1 medium brown onion, cut in half and add to TM bowl with peeled garlic cloves and basil. chop 1 sec | Sp 7 scrape down sides with spatula. Chop again 1 sec | Sp 7

6. Add 50gms olive oil and cook 4.5 mins | Varoma | Sp 2 with the MC off. Once the tomatoes are cool, peel off the skin off and add to TM bow with 200-300gms of water (if you have collected any cooking liquid in the bowl under the varoma from the tomatoes, you can use this as part of your 200-300gms water. I like 2 add 300gns but 200 with give you a slightly thicker sauce). Add 2 tbsp of TM vegetable stock & 2 tbsp sugar. 

7. Cook 45 mins | Varoma | Sp soft with basket sitting on top to prevent spitting. At the end of the 45 mins, taste and adjust seasoning if need be. If you prefer a thicker sauce you can reduce by cooking for a further 15 mins at varoma Spd soft with the basket on top.

8. Blend 5 secs | Sp 3. If you want a very smooth sauce, you can blend on a higher speed - be warned though, over processing of the tomatoes will cause the sauce to turn orange. 

If I am going to preserve this in bottles, I usually put a sprig of basil in the jar or bottle first and then pour the sauce on top. See below for my preserving tips.

I use this sauce as a base for so many meals - a base for pizza - just spread a little olive oil and then some of this sauce with some chopped garlic and add whatever toppings you please! I also use it for various pasta sauces. For a very quick easy lunchtime pasta, I mix some of this passata with a few tablespoons of smooth ricotta or a handful if crumbled feta and add a pinch of chilli flakes. Heat and stir through pasta (I would use Barilla Conchiglie Rigate for this sauce) with some freshly torn basil. I also use this with my Greek meatballs which are always a hit with my boys. 

Tip - You can freeze this sauce in portions (I always do 2-3 batches in a day) if you want to freeze for pizza, put some into icecube trays so you can take out a few at a time for quickly thawed pizza sauce. You can also bottle it. If you bottle, please follow preserving guidelines, using clean sterile bottles and bottle piping hot sauce into hot bottles.

I generally set my TM bowl of liquid aside after it's cooked and sterilise a 1 Lt bottle and lid in 500 mls water for 12 mins | varoma | sp 2. Then I add hot liquid to hot bottle/jar and seal immediately. Once I've completed all my batches, I boil the jars/bottles in a big pot with water up 3/4 of the side of the bottles or jars for 30 mins on a gentle simmer. 

Enjoy!!!


A quick lunch pasta in progress. 

Monday, 31 March 2014

Peppery Cured Salmon

I love salmon. LOVE it. It's one of my favorite things of all time. And smoked & cured salmon - I think I hear Angels calling!!!  I don't know why I've never made it myself - it's probably just never occurred to me that it's something you can easily do yourself.... But boy is it ever! This recipe is based on Fiona Hoskin's recipe from 'Devil of a Cookbook' if you don't have this cookbook I highly recommend you invest in it - it's fantastic. Fiona's original recipe is for 'Anise-scented cured salmon' - as soon as I read 'Anise' I though - I bet this would go beautifully with Szechuan pepper. One of my dearest friends Amy taught me to make this beautiful Chinese chicken dish which uses both Star Anise & Szechuan pepper and I love it - So I changed it a little bit. I hope you enjoy - we certainly did x

Peppery cured salmon


Ingredients

3 whole star anise
2 teaspoons black pepper
2 teaspoons Szechuan pepper
1 teaspoon fennel seeds
1 teaspoon coriander seeds
250grams rapadura sugar
250grams pink Himalayan rock salt 
a pinch of dried thyme
1 fillet of fresh Tasmanian salmon

Method

1.) Remove the pin bones from the salmon - just run your finger along the salmon to find the strip of bones and pull them out with a pair of tweezers (I bought a new pair specifically for this you can pick then up cheap enough at the supermarket).

2.) places all spices into your thermomix bowl and mill 30 secs | Spd 9

3.) add salt and mill 3 secs | Spd 9

4.) add sugar and thyme and mix 10 secs | Spd 5 

Depending on the size of your fillet of salmon, you may want to divide this mixture in half as this quantity will cure a whole side of salmon. I cured a piece approx 600/700gms with half of the mixture.

5. Evenly coat both sides if the salmon with the mixture patting it down firmly and put it in a Pyrex type dish with glad wrap on in the fridge over night. I did mine mid afternoon & left overnight. In the morning, turn the fish over and leave it until the afternoon evening 6-10ish hours. Time will vary depending on the size & thickness of your piece of fish. Wash the fish under the tap and then pat dry with a paper towel. Slice very thinly and enjoy! 

If you don't have a thermomix you can use a food processor or mortar & pestle using the above recipe as a guide. 


Wednesday, 18 December 2013

Green mango chutney

I was lucky enough to spend most of my childhood in Far North Queensland. To this day, the smell of Mangos and that first mango of the season, simply transports me back to that time - the sweet heady smell of summer - evoking memories of bare feet, the beach, Nan and Pop's house, swimming in the pool with my cousins, stifling humidity and an endless supply of sweet sticky mangos, the juice running down our arms as we sucked the stringy fruit off the seeds.

In early Summer when the Mango trees are full of large, full, green fruit, it's chutney time. My Pop used to make it, my Mum makes it and now I do too. This recipe is an adaptation of my Pop's famous Mango chutney, I have his original recipe written down, the page stained with splotches of yellow - a visual timeline of the many chutneys that have been made with this recipe over the years. 

This is a rich, unctuous, sweet and spicy, sticky chutney, that is delicious with cold meats, dolloped on the side of a bbq plate, it's delicious with cheese, excellent on sandwiches and I have a dear friend who loves it so much she claims it can be eaten with a spoon! It can be blended and mixed with a little olive oil to be used as a glaze for meats or roasted vegetables and is brilliant with curries.


"Pop's" Green Mango Chutney

This is a photo of the enormous and ancient mango tree out the front of our little house - we have an endless supply of mangos (as well as the possums, bats and the odd python that come with them!)


TM Instructions

Ingredients

300gms Green Mango (peeled and seeds removed)
150gms Green apple cored, cut into 4 (approx 1 large green apple)
1/2 red onion
10 gms peeled ginger
4 large cloves garlic
1 birds eye chilli
100gms dates
100gms sultanas
1 tsp curry powder
1/2 tsp allspice
1 tsp salt
300gms malt vinegar
100gms water
300gms brown sugar

Method

1. Pick your mangos! My son and I had fun knocking these low hanging greenies off with a broom!


2. Peel Your green mangos with a potato peeler and keep them in a sink of water with half a cut lemon floating in the water as you peel the rest. 


3. Cut the flesh away from the seed - get as much flesh off as you can without including any of the seed. 

4.) Add Mango flesh, Green apple, red onion and garlic to TM bowl and chop 2 secs | speed 5, set aside. 

5.) Add ginger, red chilli to bowl and chop 5 secs | Speed 6| scrape down side

6.) Add mango and apple/onion/garlic mix to TM bowl, add water, vinegar, spices, salt, dates and sultans and cook 5 mins | varoma |sp 1 | reverse with MC cap on, then remove MC cap and cook for a further 5 mins | varoma |sp 1 | reverse.


7.) Add 300gms brown sugar and cook 50 mins | 100 deg | Sp soft | reverse with the varoma bottom on top - this lets the steam out but catches the spitting.


8.) Cook for a further 10-20 mins | varoma | Sp 2 | reverse with varoma bottom on top You should be able to tell if the chutney is ready, as it will be thick and sticky, and it will 'gel' when tested on a cold plate. 

Bottle in hot sterile jars.

This recipe makes approximately 1 litre of chutney.

Stovetop Method 

I usually always make this on the stove in a nice big pot. This year a friend and I did a preserves swap, so I had the thermomix as well as 2 large pots going on the stove. The stovetop method is very forgiving, you can have a bit more or less of something and it will usually all still work out in the end. 

Ingredients:
8-10 large green mangos
5 green apples (My Pop uses paw paw 1/2 ripe, but it's not as easy to come by here as it is in Nth Qld so I use apples and I prefer the flavour)
1 cup water
1.5 litres brown vinegar
1.5 kgs brown sugar
2 handful dates
2 handful sultanas or raisins
1 large knob of green ginger (peeled)
1 large knob of garlic
6 birds eye chillies (if you don't like spice you can leave these out or reduce down the amount)
1 teaspoon allspice
1 tablespoon curry powder
1 tablespoon salt
2 large red onions

1. Prepare Mangos as per TM method (peel, cut away flesh)
2. Either use a food processor top chop mangos/apple/onion/garlic/ginger OR dice up mangos, apples, onion and garlic with a knife and grate ginger. Chop chillies finely. (I used the TM to chop everything in the picture below, it took literally seconds!)


3. Add mango and apple to a large pot with 1 cup of water and bring to the boil stirring regularly
4. Add all ingredients EXCEPT sugar to a large pot, bring to the boil and then gently simmer for 1/2 an hour, stirring regularly
5. Add sugar and simmer on a low heat for 2.5 to 3.5 hours stirring regularly. 


This recipe makes about 3.5 kgs of chutney. I didn't have a pot large enough to put everything in, so I split it between 2 pots. Just halve the recipe if you don't want to make as much, the cooking time is similar though. 


Bottle in hot sterile jars.


This is a picture of it all happening at once in my tiny kitchen, with 2 pots and the TM going at the same time! It made about 15 large jars of chutney. 

Truth be told, I don't think you can beat a long, slow cooked 3+ hour chutney, but the TM is a brilliant time saver and particularly good if you only want a few jars and not a very large batch. 

Enjoy!


Monday, 2 December 2013

Sweet Orange Jam

Sweet Orange Jam

I experimented with some Jam today. I was inspired by a recipe I found in an old 'QCWA, Japoonvale Branch - Cookery Book and Household Hints 1953' - I just liked the name of it 'Sweet Orange Jam', it made me want to taste it. The recipe was all 'lbs' and 'pints' and 'drams' and I had very little idea of what they were talking about, so I just had a crack at it using similar ingredients in my Thermomix with estimated quantities. I think the cook book once belonged to my dearest Nan, she was a great cook and used to be the person I rang asking 'Nan, quick! I'm making..... and I need to know how many mls in a pint?!' - she thought it was hilarious,you remember those days before everyone had a smartphone to just google it?! Nan was possibly one of the most amazing and special individuals I've ever met. She taught me all the good things in life - how to make jam, chocolate cake and a good cup of tea. How to sew a button, cross stitch, crochet and tend to a garden, how to pick the juiciest brazilian cherries and play a mean game of canasta.... She was just one of those special ones and we all miss her dearly. <3

So back to my jam - it turned out well and not a shameful sachet of jamsetta in sight! I think it will be delightful on some thick cut toast with home made butter and a nice hot cup of tea. I hope you enjoy it.

PS I'm told one day, when my children get older, I will once again experience the phenomenon that is hot tea... until then, one can dream...


Sweet Orange Jam

650-700gms whole oranges (I used organic valencia oranges)
750gms water
750gms sugar (I used raw sugar)

 1. cut ends off orange, cut in half and slice very thinly. You could use a mandolin if you wanted to, but I prefer to use a very sharp knife. 


2. soak oranges in water overnight 

3. drain oranges in TM basket but reserve liquid

4. weigh out oranges in TM bowl - you should have between 500-600gms (after removing ends) and place into TM bowl


 5. Weigh out 750gms of reserved orange liquid into the TM bowl and cook for: 10 minutes | 100 degrees | Reverse speed soft |


6. Add 750gms sugar, cook for: 5mins | 100 degrees | Reverse| Speed 2

7. Cook for 35-50 mins| Varoma | Reverse | speed 2 | with MC off and varoma on top to prevent spitting. The cooking time is varied, as it will depend on what type of orange and what pectin level it has, as to how quickly it's going to jell. I used valencia oranges and they took approx 40 mins. My advice would be to check every 5-10 mins after 30 mins. If you cook too long, the orange peel with candy and it will be too firm - undercook it and you'll have a sauce not a jam! The best way to test to see if jam is ready, is to put a small plate in the freezer, and once it is cold, drop some hot jam onto the plate with a metal spoon. If you jam 'jells' when put onto the plate, you're good to go. You can see in the picture below, that the jam is starting to set. Thats what you're after. (Thats another Nan trick). 


8. Bottle jam into washed and sterilised jars. I used ball mason jars which are fantastic for preserving, but any recycled jars will be fine. You will have approximately one litre of jam once it's ready. 

For a non Thermomix version, you can follow similar steps in a large pot with a wooden spoon, however you will need to keep a close eye on it with lots of stiring as you won't have a constant temperature. Test it in the same way on a cold plate and bottle as above. 


Decorated jars make lovely little Christmas gifts, I hung some homemade white clay decorations on ours and I think they look quite sweet. Enjoy!


Total Pageviews